Let’s start with a right and proper premise :
when it comes to security there’s no silver bullet
 in this specific case the “s” that is affixed to the end of the HTTP protocol does, indeed, stand for “secure” but it should read “more secure“. Probably you’ve heard about the infamous Heartbleed bug that became notorious in 2014, well nevertheless of this problem with older versions of TLS protocol, that is still being patched on many servers, we should still strive to enact additional security measures when available.
The HTTP protocol is open and vulnerable to man in the middle attacks with very little effort, any security measure you can adopt is intended to make life more difficult for any ill-intentioned individual, sure you are never perfectly certain that an attack is impossible, but why make things easier?
In this sense Google took a drastic approach, announcing August 6th 2014 that they will include the presence/absence of HTTPS encryption as one of the parameters to evaluate the rankings of the sites that appear on its SERP, appointing the HTTPS everywhere initiative.
Now that we have knowledge and realistic expectations of what it means to employ HTTPS let’s walk through the necessary steps to enable it on a site hosted on shared hosting.
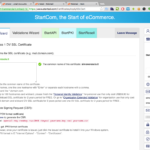
Obtaining the certificate from StartSSL
There are different types of certificates, for e-commerce and other organizations that work for profit there are obligations to specific security standards that requires them to refer to specific certification authorities, which have prices that can be very high, like several hundreds Euros per year.
For informative sites or blogs, hosting providers generally offer the possibility to produce and install, liaising with a third party authority, the TLS certificate charging a small annual fee, generally around less than 10€ per year.
However, there are certification authorities that have automated the procedure for issuing “simple” certificates in a fast and completely free way.
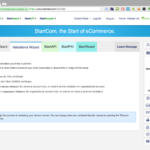
![]() Let’s start by logging on StartSSL site, if you do not have an account by entering your email for the enrollment you’ll be sent a one time password to access a newly created account linked to the email, otherwise it will just send the one time password to login to an existing account.
Let’s start by logging on StartSSL site, if you do not have an account by entering your email for the enrollment you’ll be sent a one time password to access a newly created account linked to the email, otherwise it will just send the one time password to login to an existing account.
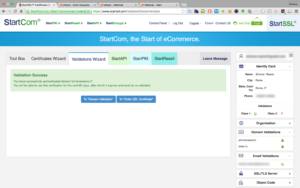
Domain validation
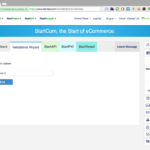
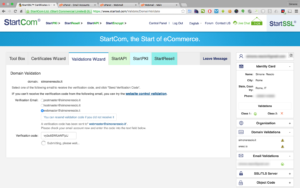
Once inside select the tab Validations Wizard and continue with the pre-selected “Domain Validation” by entering the domain concerned on the next screen, at this point you’re offered a list of email addresses with common aliases present on any site, like postmaster/hostmaster/webmaster @ domain.com, after you select which one to use you will receive another one-time password accessible only to the webmaster of the domain, depending on the server status this can take from 2 to 15 minutes to have the message hit the inbox.
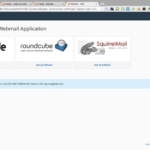
At this point, if you did set up previously your account on a mail client it’s easy to open the message and copy the code, otherwise you’ll need to go in the cPanel of your site, select Email Accounts and click on Access Webmail then select one of the available clients, in my case SquirrelMail.


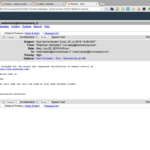
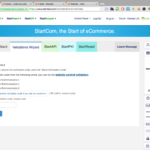
Now we have to get back on StartSSL page we had left open, copy the received auth code and the validation process is completed.
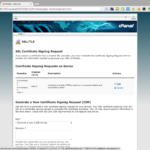
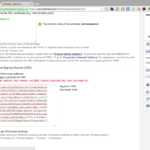
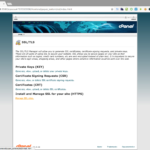
Generate the Certificate Signing Requests (CSR) from cPanel
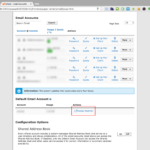
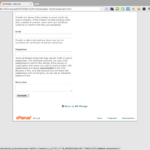
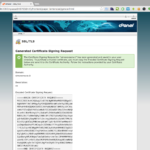
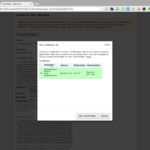
To request a certificate it’s necessary to provide a digital signature to be included in the creation of the certificate itself, which will be used to assess its validity. Starting from the cPanel home go to SSL/TLS then click on Generate, view, or delete SSL certificate signing requests. In the CSR page you’ll see on top the existing ones if any, and below there is a form to generate new ones, you’ll have to fill in all mandatory fields marked with an asterisk and hit Generate at bottom of the page, then copy the contents of the first text area with the title Encoded Certificate Signing Request.


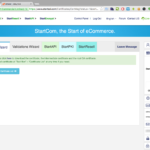
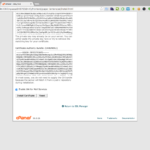
Generate the certificate (CRT) from StartSSL
Now that we have a CSR to used let’s get back to the page we left open on StartSSL and click on To “Order SSL Certificate” which will bring us the Certitificates Wizard tab, where you’ll have to type the same domains used to generate the CSR, then select Generated by Myself radio option and paste the content of the CSR in the text area, hit submit, and after a few seconds the CRT certificate is ready to be downloaded.
It’s a ZIP file in which there are other ZIP, one for each type of server, the majority of low-cost shared hosting runs on Apache platform so unpacks the ZIP to have both the ROOT and domain-specific certificates from StartSSL.
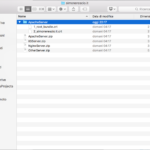
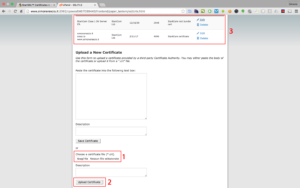
Upload the certificates on cPanel
We’re almost there, now we have to upload the files in cPanel, from the SSL/TLS page this time select the link Generate, view, upload or delete SSL certificates, select and upload one at a time both ROOT and domain-specific certificates which eventually will appear listed at the top of the page.

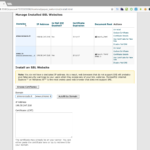
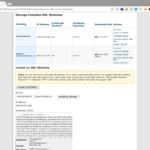
Install the certificate
The CRT certificate is now uploaded, but is not yet installed, trying to reach the pages of the site by replacing HTTP with HTTPS will result in a “not private connection” error because the certificate is not made available when pages are requested.
Returning to the SSL/TLS section in cPanel select the last item Manage SSL sites. At this point we have a page similar to those seen previously for CSR and CRT, on top a list of any certificate already installed and below a form to install uploaded certificates on available domains, click on the Domain select and choose the domain for which we created the certificate, then click on Autofill by Domain button on the right, at this point the form is pre-filled with the data contained in the certificate, scroll down to the bottom and hit Install Certificate.
Done!
Now replacing the web site URL protocol HTTP with HTTPS will result in the appearance of the desired green padlock that confirms that the connection to the website is encrypted and more secure.
Avoiding the “mixed content” error
The big part of the work is done, but we haven’t finished yet, in fact, the starting premise should be expanded to include the following pearl of wisdom:
A chain is only as strong As its weakest link.
A web page is normally composed of a plethora of “external elements”, which can come either from the same domain from which the page is served or come from a third-party provider, in any case, these resources can be requested either via HTTP or via HTTPS.
While it is acceptable for an “unsafe” page to contain “safe” elements the opposite is not, a page is safe only when every resource that is included within it (images, videos, scripts etc) are themselves safe, a page served over HTTPS will show the reassuring green lock only if all resources inside are HTTPS, except <a> links that are not resources.
If that’s not the case the padlock will be shown but with an information icon or a yellow triangle depending on the browser, this type of error due to the mix of insecure resources into a resource that is supposed to be secure is named mixed content.
As for the resources coming from your domain, such as images uploaded to your hosting and then attached on pages, you’ll have to update those URLs replacing HTTP with HTTPS. With third-party resources it could be more complicated because if they do not offer the ability to load content securely via HTTPS the alternative is to host such resources on your hosting, if copyright permits it, or turn to other providers.
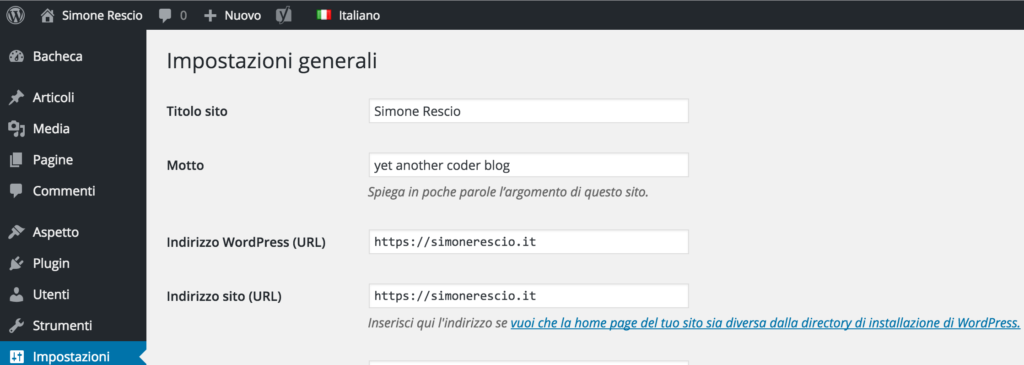
Update the CMS configuration
Almost all CMS now available, at the time of installation require basic information about the web site that they will be employed for, one of these information is the BasePath, the absolute URL that leads to the home page and to which all resources therein hosted refer to, like http://www.domain.com.
You will have to access your admin panel and look through the settings for this field and update the protocol from HTTP to HTTPS, and this new URL will be used for the attachments on the new pages that will be created in the future.
Automatic redirect to HTTPS with Apache server
Now that the certificate is installed and all the resources of our pages are served over HTTPS we must ensure that all users can benefit from it, because it is still possible to reach the site via plain HTTP, for example, those who write on the address bar the domain in 99% of cases they do not include the protocol, or maybe not all of the site internal links have been inserted as relative, then it is up to us to make sure that the selected protocol is always HTTPS by default.
On Apache server you can do a redirect by including the following instructions in the .htaccess file in the site root:
<IfModule mod_rewrite.c>
RewriteEngine On

# This checks to make sure the connection is not already HTTPS
RewriteCond %{HTTPS} !=on

# This rule will redirect users from their original location, to the same location but using HTTPS.
# i.e.  http://www.example.com/foo/ to https://www.example.com/foo/
# The leading slash is made optional so that this will work either in httpd.conf
# or .htaccess context
RewriteRule ^/?(.*) https://%{SERVER_NAME}/$1 [R,L]
</IfModule>
Renewal of Certificates upon expiration
While the ROOT certificate of the authority has a duration of several years, domain specific certificates are not valid for long, usually after 1 year they will no longer be valid and if they’re not replaced users trying to land with HTTPS now automatically enforced with the Apache redirect described above, they will meet a browser error page that warns them that the connection is not secure.
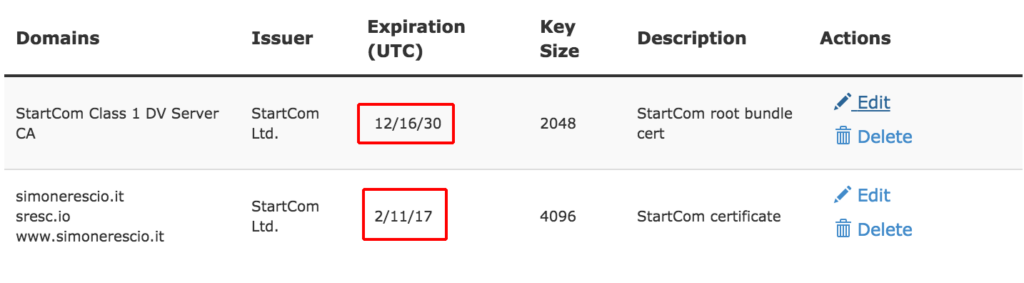
To prevent this from happening you should create a reminder on your calendar so that you will get a notice at least one month before the expiration day of the certificate, so you can start the renewal process.
You’ll have to repeat a good part of the process, in particular the domains will need to be validated again given that on StartSSL the operation has to be repeated after 90 days.
The Certificate Signing Requests (CSR) however remains valid if information such as the domain or mail contact did not change in the meantime, so we need copy into the request page to issue a new StartSSL certificate, once unzipped upload it to cPanel and finally install it on your domain by replacing the old one, once completed you can go in the certificate management page (CRT) and delete the ones no longer installed that are about to expire.
[…] my certificates from StartCom, mentioned in my guide for HTTPS, were about to expire, I started to search for a free alternative to keep my site safer, and found […]